Main Screen Templates
Each head unit manufacturer supports a set of user interface templates. These templates determine the position and size of the text, images, and buttons on the screen. Once the app has connected successfully with an SDL enabled head unit, a list of supported templates is available on sdlManager.getSystemCapabilityManager().getDefaultMainWindowCapability().getTemplatesAvailable().
Change the Template
To change a template at any time, use ScreenManager.changeLayout(). This guide requires SDL JavaScript Suite version 1.2. If using an older version, use the SetDisplayLayout RPC.
Note
When changing the layout, you may get an error or failure if the update is "superseded." This isn't technically a failure, because changing the layout has not yet been attempted. The layout or batched operation was cancelled before it could be completed because another operation was requested. The layout change will then be inserted into the future operation and completed then.
const templateConfiguration = new SDL.rpc.structs.TemplateConfiguration()
    .setTemplate(SDL.rpc.enums.PredefinedLayout.GRAPHIC_WITH_TEXT);

const success = await sdlManager.getScreenManager().changeLayout(templateConfiguration);
if (success) {
    console.log('Layout set successfully');
} else {
    console.log('Layout not set successfully');
}
Template changes can also be batched with text and graphics updates:
sdlManager.getScreenManager().beginTransaction();
sdlManager.getScreenManager().setTextField1('Line of Text');
// The promise returned by changeLayout will not resolve because it is part of a batch update, and the await operator should be avoided as a result
sdlManager.getScreenManager().changeLayout(templateConfiguration);
sdlManager.getScreenManager().setPrimaryGraphic(artwork);
const success = await sdlManager.getScreenManager().commit();
if (success) {
    console.log('Text, Graphic, and Template changed successful');
}
When changing screen layouts and template data (for example, to show a weather hourly data screen vs. a daily weather screen), it is recommended to encapsulate these updates into a class or method. Doing so is a good way to keep SDL UI changes organized. Below is a generic example.
Screen Change Example Code
This example code creates an interface that can be implemented by various "screens" of your SDL app. This is a recommended design pattern so that you can separate your code to only involve the data models you need. This is just a simple example and your own needs may be different.
Screen Change Example Interface
All screens will need to have access to the ScreenManager object and a function to display the screen. Therefore, it is recommended to create a generic interface for all screens to follow. For the example below, the CustomSDLScreen protocol requires an initializer with the parameters SDLManager and a showScreen method.
class CustomSdlScreen {
    constructor (sdlManager) {
        this.sdlManager = sdlManager;
    }
    showScreen () {
        // stub
    }
}
Screen Change Example Implementations
The following example code shows a few implementations of the example screen changing protocol. A good practice for screen classes is to keep screen data in a view model. Doing so will add a layer of abstraction for exposing public properties and commands to the screen.
For the example below, the HomeScreen class will inherit the CustomSDLScreen interface and will have a property of type HomeDataViewModel. The screen manager will change its text fields based on the view model's data. In addition, the home screen will also create a navigation button to open the ButtonSDLScreen when pressed.
class HomeSdlScreen extends CustomSdlScreen {
    constructor (sdlManager) {
        super(sdlManager);
        this.buttonScreen = new ButtonSdlScreen(sdlManager);
        this.homeDataViewModel = new HomeDataViewModel(); // holds plain object data
    }

    showScreen () {
        const screenManager = this.sdlManager.getScreenManager();
        // Batch Updates
        screenManager.beginTransaction();
        // Change template to Graphics With Text and Soft Buttons
        screenManager.changeLayout(new SDL.rpc.structs.TemplateConfiguration()
            .setTemplate(SDL.rpc.enums.PredefinedLayout.GRAPHIC_WITH_TEXT_AND_SOFTBUTTONS));
        // Assign text fields to view model data
        screenManager.setTextField1(this.homeDataViewModel.text1);
        screenManager.setTextField2(this.homeDataViewModel.text2);
        screenManager.setTextField3(this.homeDataViewModel.text3);
        screenManager.setTextField4(this.homeDataViewModel.text4);
        // Create and assign a button to navigate to the ButtonSdlScreen
        const navigationButton = new SDL.manager.screen.utils.SoftButtonObject('ButtonSdlScreen', [new SDL.manager.screen.utils.SoftButtonState('ButtonSdlScreen', 'Button Screen')], 'ButtonSdlScreen', (id, rpc) => {
            if (rpc instanceof SDL.rpc.messages.OnButtonPress) {
                this.buttonScreen.showScreen();
            }
        });
        screenManager.setSoftButtonObjects([navigationButton]);
        screenManager.commit();
    }
}
The ButtonSDLScreen follows the same patterns as the HomeSDLScreen but has minor implementation differences. The screen's view model ButtonDataViewModel contains properties unique to the ButtonSDLScreen such as text fields and an array of soft button objects. It also changes the template configuration to tiles only.
class ButtonSdlScreen extends CustomSdlScreen {
    constructor (sdlManager) {
        super(sdlManager);
        this.buttonDataViewModel = new ButtonDataViewModel(); // holds plain object data
    }
    showScreen () {
        const screenManager = this.sdlManager.getScreenManager();
        // Batch Updates
        screenManager.beginTransaction();
        // Change template to Tiles Only
        screenManager.changeLayout(new SDL.rpc.structs.TemplateConfiguration()
            .setTemplate(SDL.rpc.enums.PredefinedLayout.TILES_ONLY));
        // Assign soft button objects to view model buttons array
        screenManager.setSoftButtonObjects(this.buttonDataViewModel.buttons);
        screenManager.commit();
    }
}
Available Templates
There are fifteen standard templates to choose from, however some head units may only support a subset of these templates. The following examples show how templates will appear on the Generic HMI and Ford's SYNC® 3 HMI.
Media
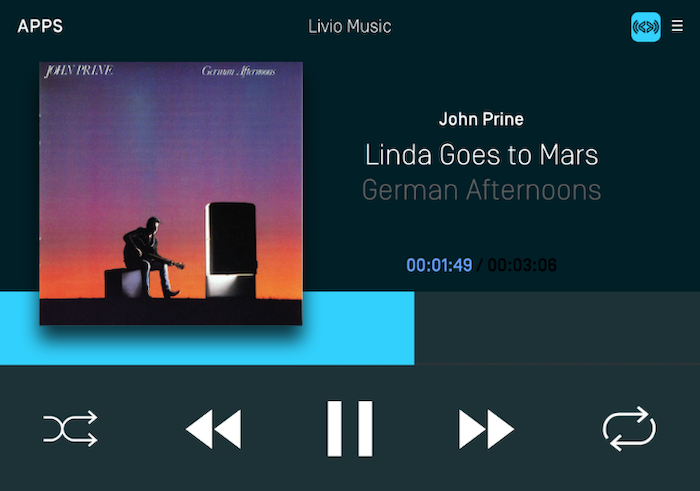
Media (with a Progress Bar)
Non-Media
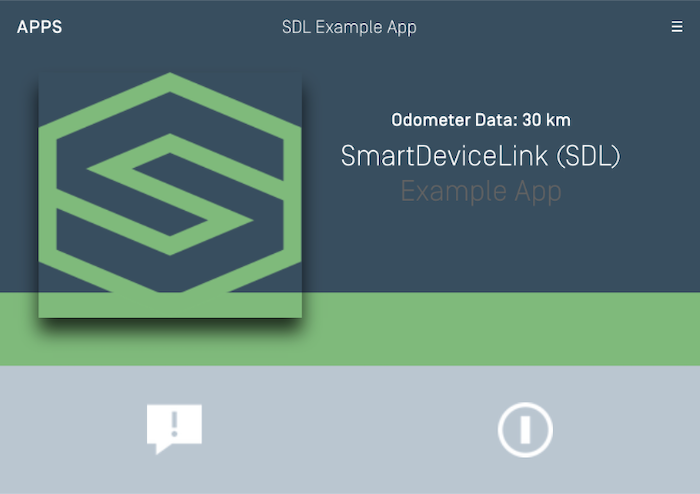
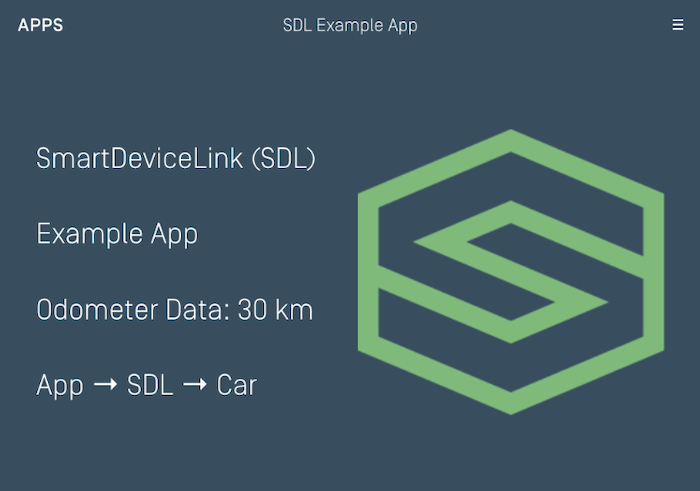
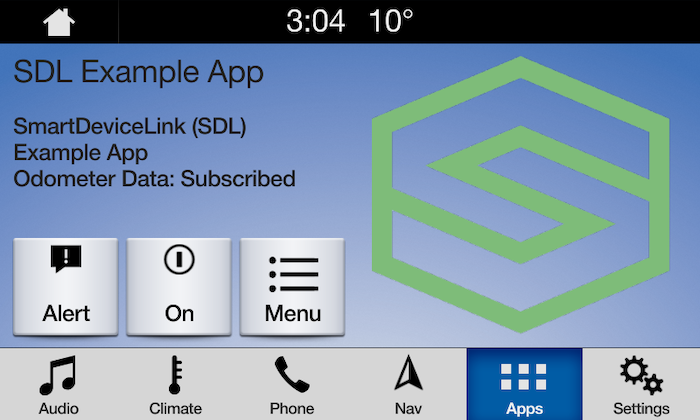
Graphic with Text

Text with Graphic
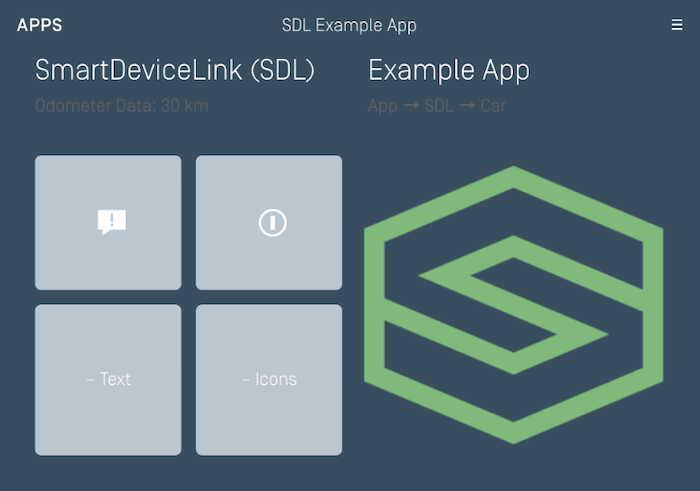
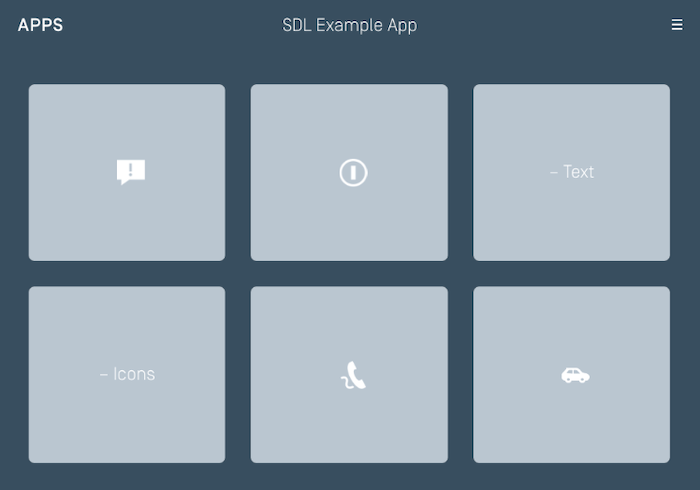
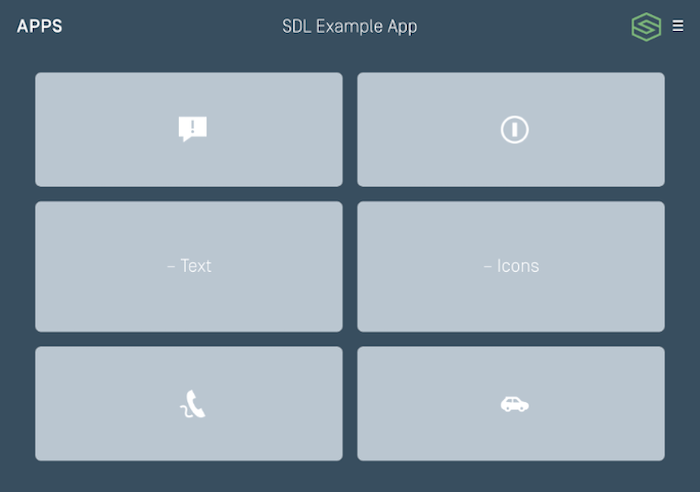
Tiles Only
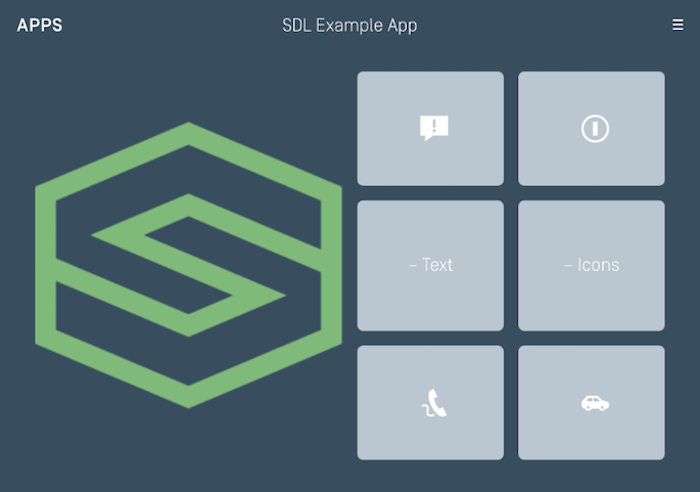
Graphic with Tiles
Tiles with Graphic

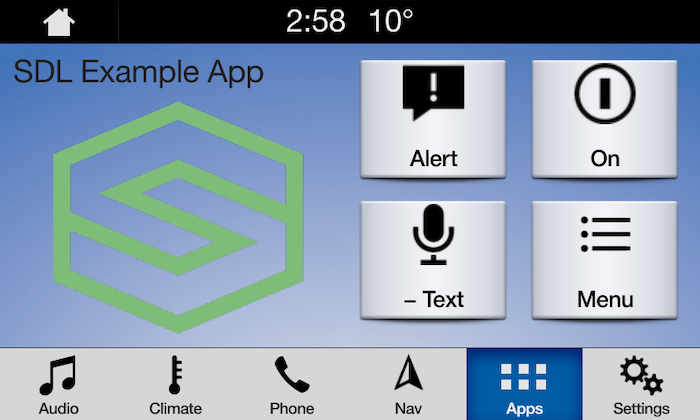
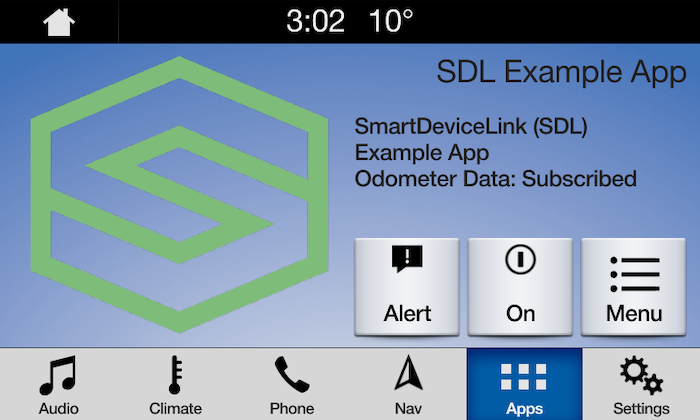
Graphic with Text and Soft Buttons
Text and Soft Buttons with Graphic
Graphic with Text Buttons
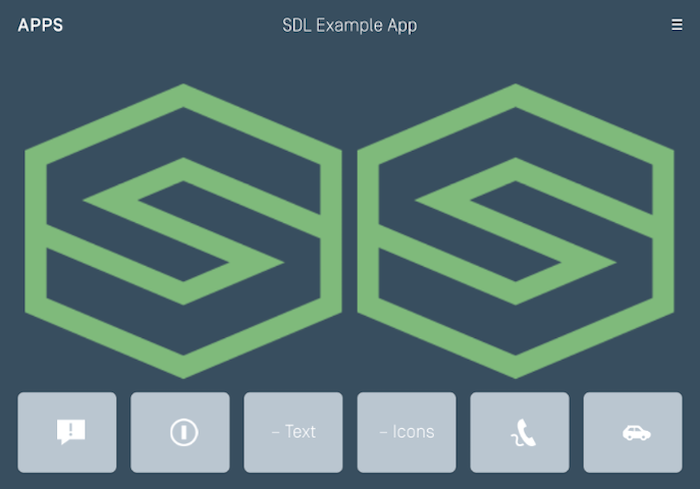
Double Graphic with Soft Buttons
Text Buttons with Graphic

Text Buttons Only
Large Graphic with Soft Buttons
Large Graphic Only